
Tessellation and Displacement
This topic has been pretty popular lately, especially since the release of DirectX 11 and the Unigine Heaven benchmark, which supports it.
Normal Normal Wireframe Displaced Displaced Wireframe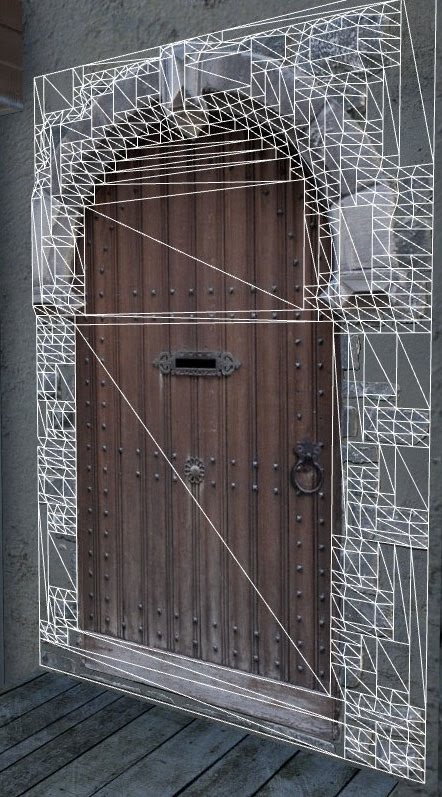
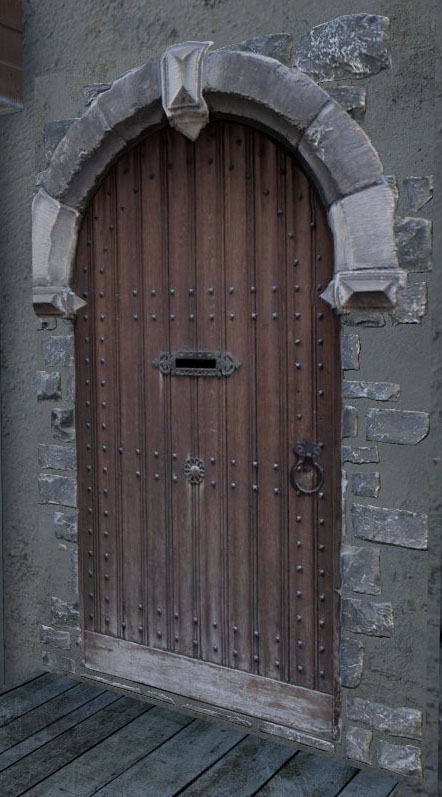
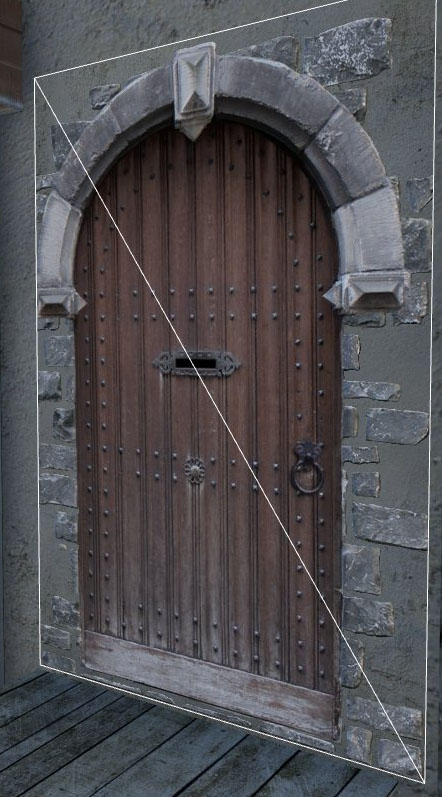
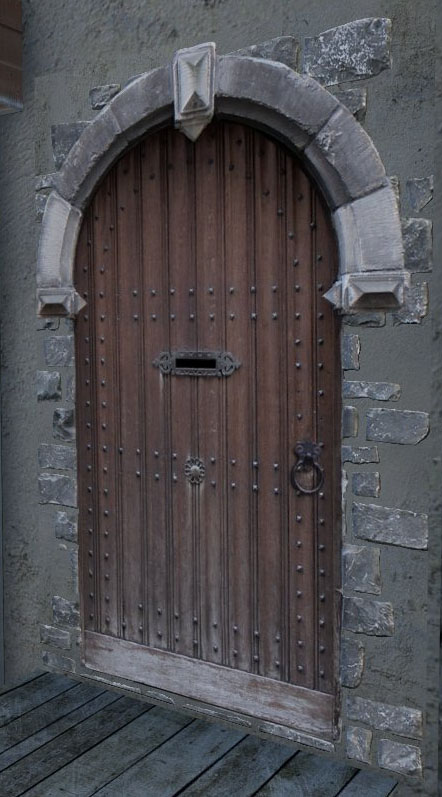
Oddly enough, what you’re looking at in this picture isn’t DX 11 and the much-talked-about realtime tessellation – it’s DirectX 9 and the output of an offline utility.
Post updated 21.11.09
I built this utility under the influence of a “global conspiracy” – my 9600GT doesn’t support the trendy new tessellation, and attempts to do displacement in 3dsmax give you a deformed shape, a sea of polygons, and generally not a very pleasant result.
With tessellation, a polygon gets split into thousands of tiny polygons, and the vertices get displaced according to a height map. We can do that part perfectly well without the GPU’s help, but thousands of extra polygons won’t do the frame rate any favors. I tried to tackle this head-on, by optimizing the polygons after the displacement pass.
The model’s mesh without optimization looks roughly like this: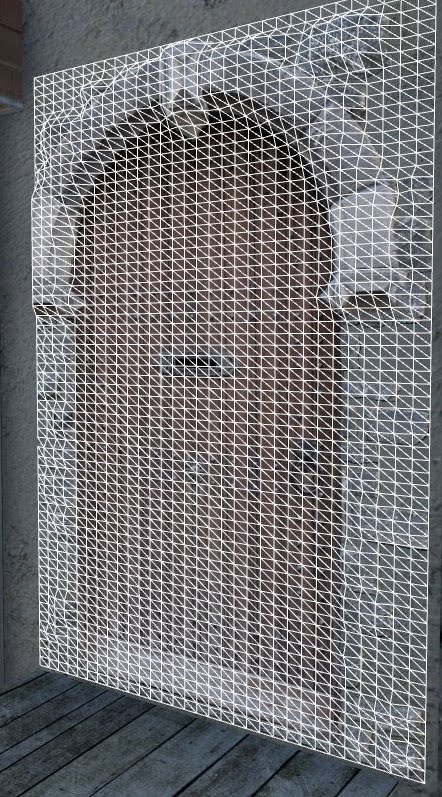
The height map is 64×64, 4096 vertices, 8192 polygons 64×128, 8192 vertices, 16002 polygons. Even at a glance it’s obvious some of the polygons are flat-out redundant. Given how they’re arranged, there’s plenty of room for optimization.
I’ll try not to get too deep into the technical details. The optimization process in my utility merges neighboring polygons based on a few different criteria. Various parameters let you control the level of detail and clean up artifacts. The resulting mesh (see the start of this post) is pretty far from perfect – some spots are overly complex, there are “hanging” vertices (a vertex sitting on a triangle’s edge) and so on. What matters more is that the door model comes out to 980 triangles, which is 9 times fewer than without optimization. That’s plenty good for a close-up view, and at a distance you can just show a flat texture instead. My graphics card doesn’t even blink at that kind of load.
The algorithm turned out to be very picky about the height map – the more “geometric” the shapes, the fewer polygons you end up with. Various half-tones, smoothing, holes, gradients – all of that leads to extra polygon count.
A hand-drawn height map for a window frame produces 112 polygons on output. The same shape modeled by hand in a 3D package could get down to 74 triangles. Maybe if you really set your mind to it, or just don’t care about the rules, you could do even better. 🙂 What matters is that the numbers are in the same ballpark, which means the technique is viable.
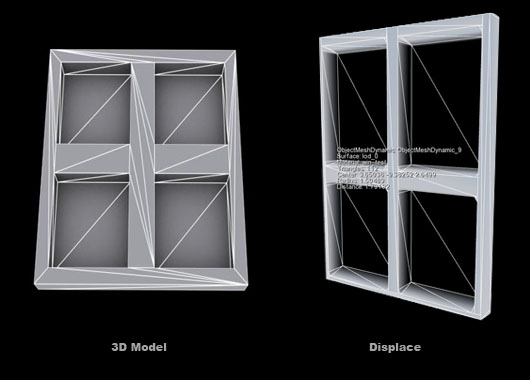
Artists will probably say this is a cop-out and that surface detail should be modeled by hand. That’s undoubtedly true, but I’ve rarely come across, say, a ready-made library of doors, windows, or rocks – people tend to remodel them from scratch for every project. Meanwhile, a texture library for such elements is standard practice, and there’s nothing stopping you from storing height maps alongside those textures. Seen that way, adding doors and windows comes down to placing a texture and running the utility a few times to generate different LODs.
Sooner or later that bright future will arrive, everyone will have DirectX 11 compatible graphics cards, and these textures will come in handy for hardware displacement. But for now, we make do with what we’ve got 🙂
Update: I remembered that the door’s height map has a 1/2 aspect ratio – that is, it’s 64×128, not 64×64 – so the polygon mesh works out to 63x127x2, i.e. 16002 triangles. After optimization it’s 980, which is 16 times fewer.
Update 2: I tightened a few more bolts and got rid of zero-height polygons. Really, why keep them, if you think of displacement as adding detail on top of an existing model? The result: 812 triangles with the exact same look. Compared to the original 16002, that’s now roughly a 19.7x reduction, and the mesh looks quite good too.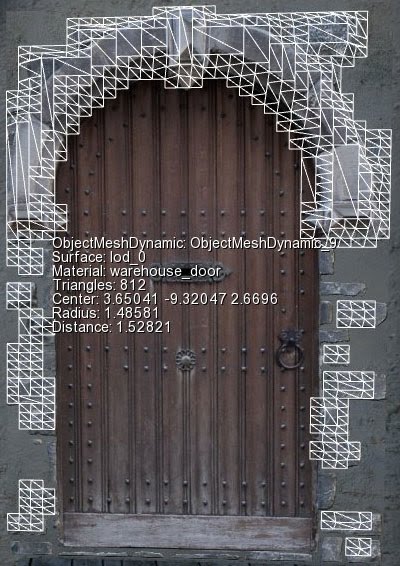
Update 3: Man is a resourceful creature. 699 triangles.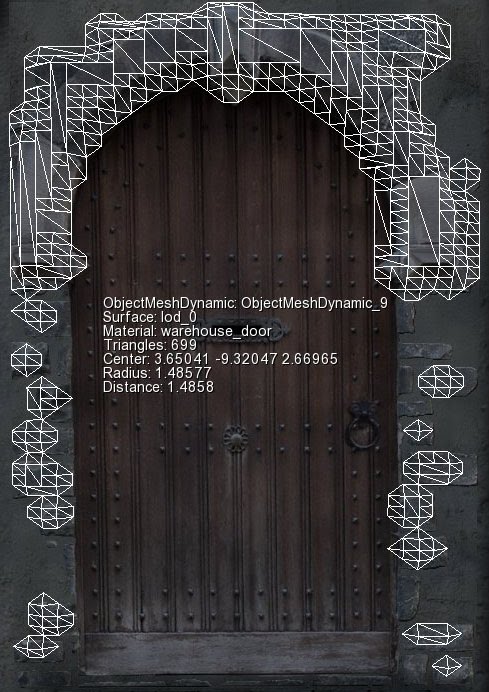
Originally published 2009-11-20.